Showing posts with label Old Glory 25s. Show all posts

Saturday, August 3, 2013

Some WOTR action

I just wanted to quickly post up a couple pictures from a recent battle fought in my living room at our new place in northern Virginia.

The wife and I fought out a hypothetical War of the Roses battle the week before Historicon (I hope to do a more detailed post with pictures from that soon). The set up was based on C. S. Grant's 'Making the best of a bad situation' scenario. The Lancastrians, marching up country, stumble into a smaller encamped Yorkist host presenting significant challenges for both sides: the Lancastrians are all deployed in lines marched halfway across the table, while the Yorkists are outnumbered and in a disorganized clump behind a hill.

A smaller action was fought on a separate table that would eventually lead onto the main table, in which an offshoot of the Lancastrian vanguard has to split off to delay a group of Yorkist reinforcements.

The rules were my own period specific variant of Hostile Realms by Piquet, which I have taken to calling Hostile Roses. I am continuing to develop these and there is still much adjustment to be made. The wife graciously offered to play the Lancastrians (since she knows I despise the usurping dogs!!), while I took command of the Yorkists.

The result was a decisive Yorkist victory. The Lancastrian vanguard  did an excellent job of keeping off the Yorkist reinforcements, but back on the main table the Yorkists crushed the center of the Lancastrain army.

Richard, Duke of Gloucester and his men are hard pressed to relieve the embattled Yorkist main force due to a fierce effort by John, Lord Wenlock's men, including some hired Welsh spearmen (center).

Back on the main table, Edward IV sweeps down the hill to crush the Edmund Beaufort, Duke of Somerset before he is surrounded on his right by the other half of Wenlock's vanguard (temporarily under the command of Edward, Prince of Wales while Wenlock fights his delaying action).

It was an enjoyable afternoon/evening with the wife; much fun was had by all.

Si valetis bene est,
-The Fox

Friday, August 17, 2012

Lancastrian Commanders

Here we feature the commanders of my recently painted Lancastrian forces for the Battle of Tewkesbury. We have already had one re-fight, using a version of Piquet's Hostile Realms which I have modified slightly for period flavor and tactics, and I am tentatively calling 'Hostile Roses.' There will be a short write-up on the action in the days to come when I find the time.

Here are the ward commanders beginning with the vanward and proceeding down the line.

First we have Edmund Beaufort, 4th Duke of Somerset (and his infamous axe). One of the myths surrounding the Lancastrian collapse on the field is that Somerset, in his rage at John Wenlock over his lack of support for Somerset's (botched) flanking maneuver, caved in the old soldier's skull with his axe--an act which helped precipitate the rout. He was facing Richard, Duke of Gloucester across the field (as Edward IV had his vanward on the left, presumably to match his more skilled younger brother against the slightly more experienced Beaufort, rather than leaving the job to Hastings, who had performed poorly at Barnet in the weeks prior).

'Souvent me souvient!' (Somerset = Perry metal; others = Old Glory 25's) 

In the mainward we have the tough ol' John, Lord Wenlock. Wenlock had once been on the Yorkist side, but that was because he was a devoted follower of the Earl of Warwick. When Warwick betrayed to Margaret of Anjou, he took his seasoned commander with him. For the scenario, I have put Edward of Westminster, Prince of Wales with Wenlock in a sort of 'understudy' role and as an objective for the Yorkist forces. Wenlock was pitted against the ever-doughty (and later doughy) Edward IV.

Not even his turtle-like appearance could save him from  Somerset's fury. (Wenlock = Perry metal; others = Old Glory 25's)

The eighteen-year-old needs a little advice from the Hospitaller John Langstrother. (Edward and Langstrother  = Perry metal; others = Old Glory 25's)

Bringing up the rear is John Courtenay, 15th Earl of Devon. Devon was squared off across the field from Lord Hastings. He was not particularly influential in the battle from reports, since it was largely decided on the other side.
All dressed up, nowhere to go. (Devon = Perry metal; others = Old Glory 25's) 

I hope you enjoy the photos! Good gaming to all.

S. V. B. E.
The Fox

Sunday, May 20, 2012

Battle report: The Harrying of the Northern Tribes

History, as is often said, is written by the victors.

From Dunstone's Chronicle containing the Annals of the Realm of Angaland: 

In the spring of the eleventh year of his reign and the thirtieth of his birth, Eddard, Fourth of His Name, King of All the Angalish, did make an expedition against the tribes of the north, necessitated by an ever-increasing number of raids and border encroachments perpetrated by the seemingly restless tribesmen.  With him did go his energetic brother, Rickon, Duke of Glockster, and his faithful constable Willem, Lord Aystings, along with a full contingent of fighting men made up of their household forces. These forces did number somewhere near 6500 men afoot, armed with bow and bill, and including contingents of pikes and handguns from the Lowland realms; therewith rode some 250 mounted men-at-arms for use as scouts, and a contingent of eight newly crafted black powder artillery pieces. 

The King did travel north with malintent, for he was greatly angered at the tribesmen's continued audacity against his citizens, and as the King was ever the loyal protector of his people, he set out to do rightful harm unto the tribesmen in recompense for their unjust and unprovoked assaults. He sought eagerly to establish a foothold in the northern lands by establishing a base for his harrying of the north at the shallow fords of the River Tine within the lands inhabited by the ruthless savage. The King, ever filled with daring in matters of soldiery, hasitly rushed with his own household and mercenaries to create a bridgehead to secure the crossing for the forces of both the Duke, his brother, and the Lord Aystings. The presence of so many men under arms did come to the attention of the inhabitants of that wooded country, and there was a great alarm amongst the men of the tribes. A hasty defense was mounted, as Errmann, Chief of the band who call themselves the Nordomanni, called for men to repel the southron invaders. To his summons came tribesmen in the thousands, and with promises of a portion of the ransom for the king which Errmann claimed he would capture, the chieftain did lure into his service the mercenary captain Durgorix, called the Veteran, accompanied by his band of tribal cavalry and his paid contingent of foul orcish creatures. So too came the warrior Horgen, known as the Audacious, all in jest; for on the field he was known to be overly bold or not bold at all--a characteristic which often led his men unto their early deaths. All told the savage tribes numbered some 20,000 tribesmen afoot, 1000 a-horse, and nearly 3000 foul-spawned creatures of orcish extraction [These numbers, like most which pertain to the enemies mentioned in Dunstone's Chronicle, have been exaggerated at about double the numbers considered likely by battlefield researchers.- Ed.]. 
Initial overview (Hi, kitty!!)


View from the corner of the table

The northron left, led by Horgen the Audacious
Close up on the barbarians in the village.
The ridge's crest, with Errmann in front of his bodyguard.
The foul denizens on the northron right: Durgorix can be seen behind the tray of goblins at the head of his cavalry, who would not see much action at all. Never trust a mercenary...
These did gather upon a long crest overlooking the river's crossing, near one of the southernmost Nordomanni hamlets. From there they did look down and see the royal host arrayed in the river's bend, where the King himself went afoot, clad in his gilded armor, amidst his loyal soldiery, clasping men by the forearm or clutching them upon the shoulder, whereupon he would call them 'Brother' or 'Friend' to rouse in them their battle-courage. The king, seeing the horde drawn up upon the ridge did know that to fall back beyond the river would surely mean defeat. If, however, he could hold long enough for his leftenants to make the crossing, and then with a mighty surge plant his banner upon the ridge's crest, he was assured that the day would belong to him.

Looking down from the ridge
Looking up to the ridge
When battle was at hand, the King did act swiftly and decisively, as did his wing battles. The Northron savage, however, stood rooted, unable to cope with the swift advances of the Angalishmen. When, at length, the hordes began to stir, it was from Horgen's quarter that the first push came. Seeking to bar the Lord Aystings from the completion of his crossing, Horgen's tribemen surged forward, only to break upon the Constable's forces as waves against Angaland's southern cliffs. Horgen himself was caught up in the rout, and just barely managed to extricate himself from its press to retain command over his men. The Lord Aystings did the King good service on the day, and in time, the newly forged guns would also tinge the northern soil red with northron blood.

The forced crossing of Aystings, and Glockster in the far background. Horgen advances.
Horgen's attack repelled; the advances.
The Duke of Glockster did advance at speed as well; some say he crossed more swiftly than Lord Aystings. His march across the ford was unopposed, as all men know that the orcish brood is a dull one, and is slow to react or understand a changing situation. Seeing his brother's swift advance, the King did rally his men and begin a cautious and measured advance towards the ridge. This advance was countered by the chieftain's forces, as at long last they stirred their courage to sweep down the ridge upon the combined forces of the King and his brother, who was also feeling pressure from the orcish contingent. These foul creatures, though large and apparently fierce, were no match for the young Duke's vigour [This will remain one of the mysteries of the battle. That a group of bloodthirsty orcish Toughskins should be so easily brushed aside borders on the unbelievable. Nevertheless, I think we must take Dunstone's word for it, as it fits with the overall depiction and result of the battle as a crushing victory for King Eddard. -Ed.].

Despite the horde's impetus, the king's men held, though some were troubled by a mob of painted savages who seemed to have worked themselves into a blood frenzy. The Nordomanni push came to naught, and then the King did turn the screw. With a mighty push, he himself led his men into the bloody fray. The courage of the savage is as the flash of a falling star, burning bright and brief, while the courage of the noble man, of which King Eddard was but one, is as the eternal sunne in all its splendour. The northron fled before the flashing armaments of the King, and a mighty roar did go up from the royal host as the King's banner was planted upon the ridge-crest, proclaiming the battle justly won with its words, "God's, and my right!"

The center collides. The Toughskins routed by Glockster's extreme  left.
The northron center crumbles. The King surges forward.
The King takes the ridge, chasing Errmann, who is in the process of running away with his bodyguard.
A great slaughter of the foe was made, and it is said that the day is remembered among the northern tribes as a black stain upon their history. The failure of the Nordomanni to bar the King's way resulted in a great harrying of the northern lands, the thought of which still causes the northron--be they man, woman, or child--to weep bitter tears.

The Major Morale check roll: can't get any lower than that!


[You have just read a narrative account of the most crushing victory I have ever secured on a miniatures table. The rules were Hostile Realms by Piquet. The opponent was the Official Wife, aided (if we can call rolling 1's aid) by our son. The scenario is based on Charles Grant's "Bridgehead Breakout" scenario. The tribesmen would win if they could repel the invaders back beyond the river, while the invaders would win if they could secure the ridge and hold it.

The battle was a walk despite sides which on paper were quite balanced. Between my wife and son, they managed to roll a total of around fifteen 1's. They were good sports about this however, and the weeping of bitter tears was left to their fictional charges. The game got off to a good start for the Angalish, as they won the first initiative by 11 (!!) and chose to act first. The tribesmen are an offensive army, and they were put on the back foot from the get-go. Amazing disparity in our dice rolling saw me rout unralliable 3 units, as well as the full destruction of 4 units. The Angalish lost only a single melee and a single morale chip. There was no need for tactical morale challenges: the tribesmen took care of the running themselves.

The poor wife saw only a single move card, and never got her berserker card, or anything else remotely decent. It also killed her when after going through many of her not so great cards, we tied on the initiative roll and we had to reshuffle the decks! Thankfully I am married to such a pleasant companion, who not only loves miniature gaming, but knows how to take a drubbing with grace. 

The battle ended on a major morale failure just after the Angalish took the ridge. I had just had a run of 8 cards, and when it was the wife's turn to flip, Major Morale was the second she flipped. And characteristically for the day, the roll was a 1. It was a day to remember for me, as the wife usually gives good sport, and beats me with regularity. But as we all know, the wheel of fortune continuously turns, and I know that those who crest its top will soon find themselves upside-down at its bottom.

Great rules, great company, and great fun!]

S. V. B. E. 
-The Fox

Monday, May 14, 2012

The Yorkists Have Landed

I have completed the basing of my Yorkist forces for use with Band of Brothers (2nd) by Piquet. I thought that now they are complete I would share some photos with everyone. This army is going to continue to expand, but I now consider it 'complete enough'--that is, enough to give a good game in the battles for which I am building it. It has ten bill and bow blocks, 2 mercenary units (pikes and hand-gunners), a cavalry unit, and a set of guns (14 total units). The Lancastrians are up next, and I already have two of their units done, out of the seventeen total planned.

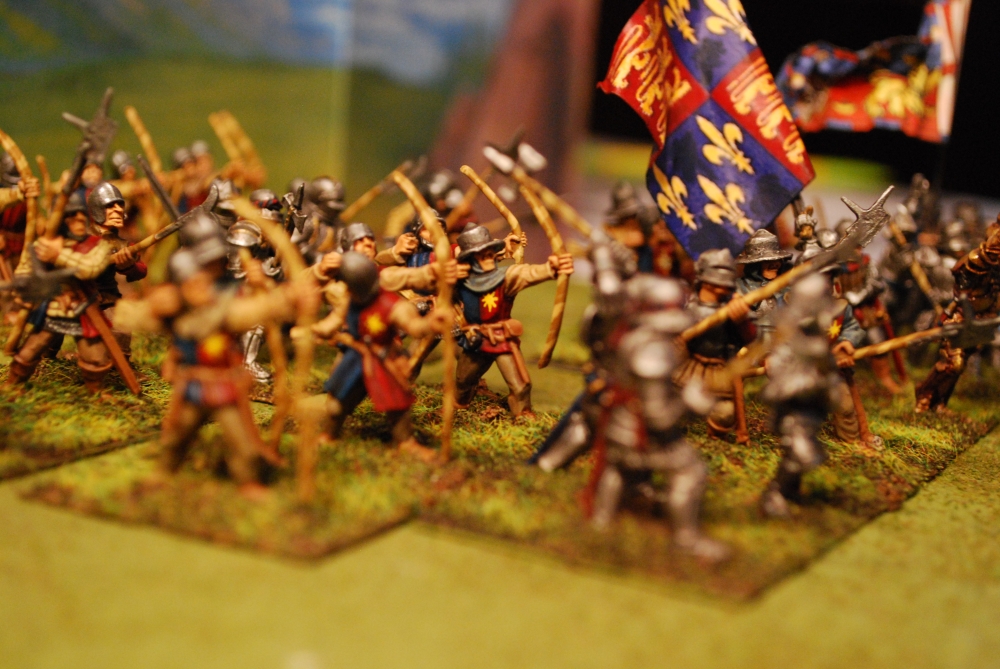
With that said, on with the eye candy! Be sure to click through for bigger photos. All figures are from Old Glory 25s, except for the three commanders, who are by Perry.

An overall view 

A close up on Edward IV, leading from the front. 

The cavalry!

Organ guns!

Aerial shot

I hope you enjoy! Let me know what you think!

S. V. B. E.
-The Fox

Friday, May 4, 2012

WOTRs: Yorkist Commanders

Accompanying Edward (who can be seen in this previous post) in his bid to retake the throne of England were his two steadfast companions, Richard, Duke of Gloucester and William, Lord Hastings, who had both been his companions in exile. The then eighteen-year-old Gloucester's first battlefield command was on the foggy field of Barnet, where he acquitted himself rather well; he would go on to earn a reputation as a sound warrior and skilled commander. As for Hastings, the overlapping flank of the Earl of Oxford (the fog had skewed the positioning of the troops, causing the battle to be fought in a sort of pinwheel shape) made quick work of his men who fled into the town. Fortuitously, the failure of Hastings to hold his men (to his defense, in admittedly perilous circumstances), however, did not win the day for the Lancastrians, as the Earl of Oxford's men did not capitalize; they instead set about pillaging and looting. The performance of Hastings at Barnet is the suspected reason for Edward IV's decision to reverse the deployment of his battles at Tewkesbury: he preferred to have the capable Gloucester facing the more experienced Duke of Somerset. Hastings did not go unrewarded for his loyalty, of course, as he was granted the lieutenancy of Calais once Edward had retaken his throne.

Here are some pictures (bases unfinished--par for the course). The commander figures are from Perry, while the others are all Old Glory 25s.


Richard, Duke of Gloucester


William, Lord Hastings

Enjoy!

S. V. B. E.
-The Fox

Tuesday, May 1, 2012

WOTRs: Yorkist Mercenaries

When Edward IV re-crossed the Channel  in 1471 in a bid to reclaim his throne, (recall that the alliance of Warwick and Queen Margaret had driven him into exile in Burgundy,) he brought with him mercenaries from the Low Countries and Germany. In my building of forces for the battles of Barnet and Tewkesbury to play with BoB2, I felt it necessary to paint up a little something to reflect the presence of these forces. And from a wargaming perspective, it opens the game up a little bit when you can include varied troop types (particularly in the WOTR period, wherein the board is covered in large part with various grades of bill and bow blocks).

I have a unit (certainly there would not have been enough men to constitute a whole pike 'block') of mercenary pikes, painted up to resemble a mishmash of Low-Countries fighting men. Here are some photos, and as usual, I apologize for not having their bases finished. (I hate basing so much that I avoid it as long as possible, and do it in large batches.) I also plan on adding a couple of flags to the pikes when I get around to it.

All figures are from Old Glory 25s. These are not from their War of the Roses pikemen, but rather the heavy pikemen from their Swiss and Italian Wars range. I thought the sculpts on these looked a little nicer.


We know that Edward was given a group of handgunners from the Duke of Burgundy as well, so I have painted some of those up too. They are done up in Burgundian livery, though how likely it is they would have worn it on the field while under Edward's command, I am not certain. I just really like the color combinations, and also, they can be used in a Low Countries army of the same period, should I choose to build it.

These too are Old Glory 25s, and from their Wars of the Roses range.


I hope you enjoy the pictures, and I hope to post later in the week with my recently painted command stands, featuring Richard of Gloucester, and William, Lord Hastings.

S. V. B. E.
-The Fox

Wednesday, April 4, 2012

An update and some randomness from the painting desk

To begin by stating the obvious, it has been a while since my last post. Let's just say that a(n ancient) Latin ogre (check your Monster Manual) by the name of Gaius Julius Dissertatio clubbed me over the head and dragged me bag to his lair, and (to mix my ancient cultures) I was only able to escape by clinging to the belly of a ram when he let his herd out to pasture.

I have managed to get some painting accomplished in the interim: my Wars of the Roses project continues, though not as much progress has been made as I would like. Richard of Gloucester's retinue is complete, and I have started in on Will Hastings, and I have also completed a levy bill-bow unit, and some Irish mercenaries for the Lancastrians. The project is about 40% 'complete' (i.e. building for the Battle of Tewkesbury)--as if any wargaming project ever achieves its telos.

I also wanted to post up some pictures of random stuff that I has come from my painting desk at one time or another. A miniatures blog entry is like a PowerPoint presentation: if there aren't any pictures, you're doing it wrong.

Here we have some Scythian nobles from Old Glory 25s: they can easy represent any sort of unruly steppe nomad types on the skirmish table. I was incredibly surprised with how much I liked the sculpts (particularly the middle guy), since I bought them on a whim. No one really knows what the Scythians looked like, as the sources conflict, and archaeological excavations of tomb mounds has turned up mummified corpses which look Ukrainian, and DNA analysis has shown others to be related to the steppe people of western Mongolia. They were likely a mixed grouping of confederate tribes who intermingled.

Apologies for the unfinished bases: that's on the agenda.

Obligatory close-up
The Wife bought some Splintered Light forest creatures (note the cuteness factor) which she has tasked me with painting. This will happen in fits and starts when I feel like painting something tiny. I have never painted in 15mm before: these are my first ones.

My little namesakes! Some sweet little foxes. (Hide the chickens!)

And here are some oldies, painted a goodly while ago, that I don't mind posting up. First we have some Old Glory Norman heavy horse painted up a Swan Knights of Dol Amroth on a whim. I added their head-wraps with some green stuff.
Front view.

Shield view.
And lets finish it off with the following, as whose collection could be complete without a Fellowship (obtained on the old e-bay for $5, I might add: no way am I paying Game$ Work$hop prices!)?

I love Boromir. It's like Richard Sharpe at a Ren-faire.
That's all for now. I hope my next post won't be so long in the making. May the gods of dice and paint favor you!

Si vales, bene est,
-The Fox


Friday, August 5, 2011

Edward IV retinue

For the past week or so I have been at work painting my Old Glory 25's War of the Roses figures up to use with Piquet's Band of Brothers rules.  The strategy I am using to tackle the project is to paint individual nobles' retinues for the Battles of Barnet and Tewksbury (both rather small engagements, compared to others), which, once they have reached playable proportions, will be added to gradually with militia troops, mercenaries, and artillery.

I have finished Edward's retinue troops and thought I would share a few pictures.  All the figures are from Old Glory 25's (except for Edward himself, which is a Perry), and I must say, that Old Glory can be hit and miss, but the War of Roses range has impressed me so far (though some of the casts have been poor--par for the course).  It is definitely one of their better ranges from what I have seen, and they paint up easily.  They are detailed enough, but not overwrought--just my style.

On with the eye candy! (Click through for larger photos.)

The retinue assembled.


Side view with some archers.
Ol' Ned himself, taking time out from wenching to kill some Lancastrians.


I hope you enjoy!
Si Vales, bene est!